Free Video Conferencing on Your Server
Social distancing has shaped an increase in usage of remote working tools. One such tool is Jitsi video conferencing. In this article, I want to describe how easy it is to spin up a free video conferencing server. The tools used are Jitsi, the open source and free video conferencing software, Terraform and Ansible. As a cloud provider, I leverage Digital Ocean because of its competitive pricing.
Note that while the software is free, depending on which server you provision, different costs may apply.
Jitsi
Jitsi (https://jitsi.org/) is an open source video conferencing solution that is encrypted and leverages the latest Web standards. Thus, you only need a browser to talk to other people. It was founded in 2013 by Emil Ivov. The name Jitsi comes from the Bulgarian word жици which means "wires". Since 2013 the developer community around Jitsi has continued to increase.
Server Creation
In order to quickly create a server on Digital Ocean, I use the tool Terraform (https://www.terraform.io/). It can reproducibly create server instances on most cloud platforms just by writing configuration files.
This is what an example instance of Jitsi would look like. It is recommended to have at a minimum a server with 3 GB, better 4 GB of RAM.
variable "do_token" {

}

resource "digitalocean_ssh_key" "default" {
  name       = "Jitsi Ubuntu SSH Keys"
  public_key = "${file("/Users/yourid/.ssh/id_ed25519.pub")}"
}

provider "digitalocean" {
  token = "${var.do_token}"
}

resource "digitalocean_droplet" "web" {
  image    = "ubuntu-18-04-x64"
  name     = "jitsi-1"
  region   = "fra1"
  size     = "s-1vcpu-3gb"
  ssh_keys = ["${digitalocean_ssh_key.default.fingerprint}"]
}
You need to adapt the path to your public key file and the region where the server resides in.
Then run the commands:
terraform init
terraform apply
You will be asked your Digital Ocean token that you can retrieve from the console of Digital Ocean.
DNS Configuration
Once your server is created, you can find the IP address in the terraform.tfstate file under ip4_address.
You now apply this address to your DNS configuration. In Cloudflare, for example, you create a DNS A record with the IP address as content and "DNS Only".
After you have applied the DNS changes, you need to wait until they are updated in the DNS servers. This can take a while, and you can check with dig or nslookup if this is the case.
Software Installation
For an automated installation of Jitsi on the Ubuntu Linux server, we use the free Ansible (https://www.ansible.com/) tool. You can install it on Mac with a simple brew install ansible. For other operating systems, check the installation guide on ansible.com.
In order for the Ansible script to work, you need to adapt three variables. One is found in
the hosts file. There, you need to change the ansible_host to your IP server address.
Then there are two variables in the install_jitsi.yml script. One is the domain name (domain_name)
which is the domain you have configured, for example with Cloudflare or your DNS system.
The other variable is the email address (email_address) you need for the Let's Encrypt software that
will generate a valid TLS certificate.
hosts
[default]
jitsi ansible_host=your ip4 address
install_jitsi.yml
---
- name: Install Jitsi Meet
  vars:
    domain_name: videochat.yourdomain.com
    email_address: [email protected]
  gather_facts: 'no'
  hosts: jitsi
  become: yes
  remote_user: root

  tasks:
    - name: Add repository Universe
      apt_repository:
        repo: deb http://archive.ubuntu.com/ubuntu bionic universe
        state: present

    - name: Set hostname file to correct domain name
      lineinfile:
        path: /etc/hostname
        regexp: '^jitsi-1'
        line: '127.0.0.1 localhost {{ domain_name }}'
        owner: root
        group: root
        mode: '0644'

    - name: Add three lines to system.conf
      lineinfile:
        path: /etc/systemd/system.conf
        line: '{{ item }}'
        owner: root
        group: root
        mode: '0644'
      loop:
        - 'DefaultLimitNOFILE=65000'
        - 'DefaultLimitNPROC=65000'
        - 'DefaultTasksMax=65000'

    - name: Reload systemctl
      command: systemctl daemon-reload

    - name: Add Jitsi package
      raw: echo 'deb https://download.jitsi.org stable/' >> /etc/apt/sources.list.d/jitsi-stable.list

    - name: Get GPG Key
      get_url:
        url: https://download.jitsi.org/jitsi-key.gpg.key
        dest: /root/jitsi.gpg

    - name: Add PGP Key
      command: apt-key add /root/jitsi.gpg

    - name: Install apt-transport-https
      apt:
        name: apt-transport-https

    - name: Run the equivalent of "apt-get update" as a separate step
      apt:
        update_cache: yes

    - name: Remove Nginx
      apt:
        name: nginx
        state: absent

    - name: Remove what remains
      command: 'apt -y autoremove'

    - name: Write interactive values for automated installation
      raw: "debconf-set-selections <<< 'jitsi-videobridge jitsi-videobridge/jvb-hostname string {{ domain_name }}'"

    - name: Write another interactive values for automated installation
      raw: debconf-set-selections <<< 'jitsi-meet jitsi-meet/cert-choice select Generate a new self-signed certificate (You will later get a chance to obtain a Let'\''s encrypt certificate)'

    - name: Install jitsi-meet
      apt:
        name: jitsi-meet
        state: present

    - name: Install certificate
      raw: "echo '{{ email_address }}' | /usr/share/jitsi-meet/scripts/install-letsencrypt-cert.sh"
In order to run the installation of Jitsi on your target host, you need to run the following command:
ansible-playbook install_jitsi.yml -i hosts
Testing
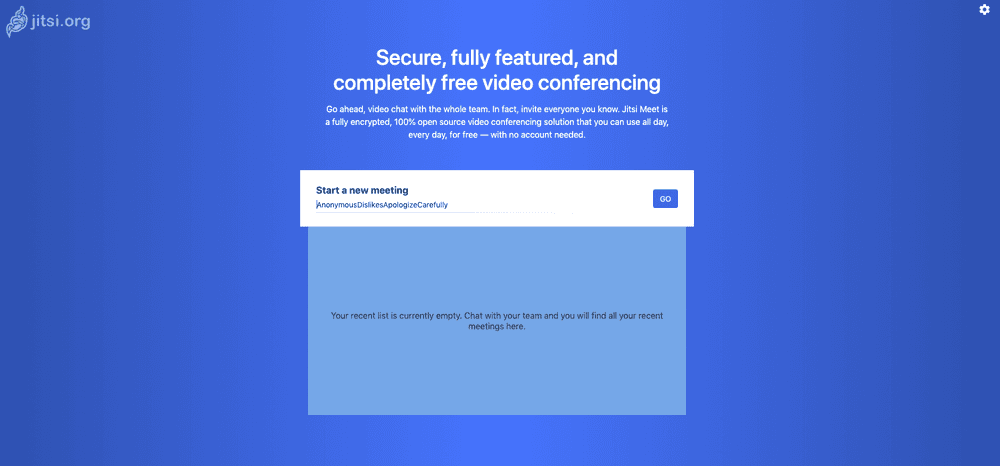
If everything went fine with the installation, you can check it and enter the domain name you configured in the browser.
The video conferencing interface of Jitsi should now appear, and you can start creating a room and go chatting.
Conclusion
While there is now a Digital Ocean Marketplace image of Jitsi (https://marketplace.digitalocean.com/apps/jitsi-server), I think the solution in this article can be flexibly applied to other environments as well, like an in-house server or servers at other cloud providers.
References
-
GitHub source code: https://github.com/tderflinger/jitsi-deployment
-
Jitsi: https://jitsi.org/
-
Terraform: https://www.terraform.io/
-
Ansible: https://www.ansible.com/
-
Digital Ocean: https://www.digitalocean.com/
-
Wikipedia Jitsi: https://en.wikipedia.org/wiki/Jitsi
Published
21 Apr 2020

Written by Thomas Derflinger
I am a software entrepreneur who builds innovative solutions. On this blog, I share practical guides and insights on web development, IoT and AI.